Making Sudoku game from scratch
Utilizing algorithms and data structures for fun
7 min read
Finally, after having an idea almost three weeks ago, I can write about making a simple Sudoku game from scratch!
Try it live: https://chornonoh-vova.github.io/sudoku/
It all began in this post - Sudoku verification , where we’ve explored what Sudoku is and various approaches that we can take to verify if it’s correct. Then we stepped it up next week - Solving Sudoku , where we explored backtracking and utilized it to solve the Sudoku, and built a fun visualization along the way. And this week, I’ll walk you through how I built a simple Sudoku game combining all the algorithms and data structures into something fun!
I built this game with React for UI, TypeScript because I enjoy its type safety, and Tailwind for styling. I’ve deployed it on the GitHub Pages, and made it a PWA so it can be installed right into the home screens.
Here’s how it looks like:
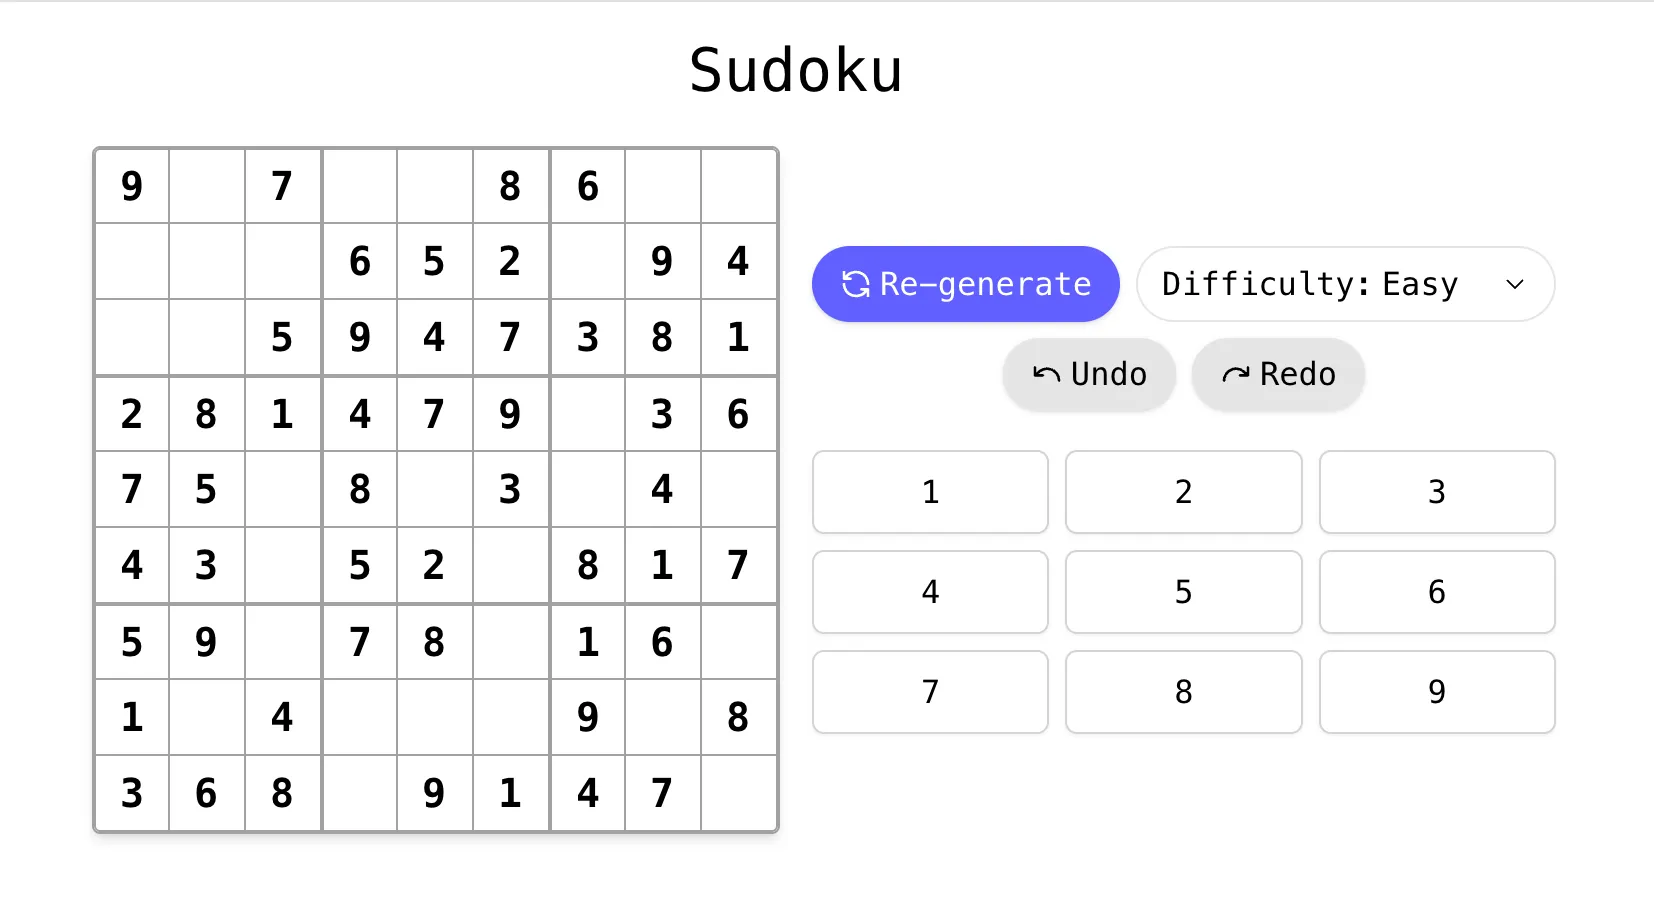
The first time you open the game, Sudoku puzzle is generated and stored into a local storage. And every time when you come back, it’s loaded back right from where you stopped - with all of the initial and manually filled out cells. Of course, you can also generate new puzzle - and this time I implemented proper generation, let me walk you through how it’s done.
Puzzle generation
I’ve decided to take the following approach:
- Generate a fully filled out grid
- Randomly remove one cell
- Check if puzzle that remains has unique solution
- If not - put a number back - and go back to step 2
- If puzzle has unique solution, continue
- Check if we removed enough cells (for certain difficulty)
- If we removed enough - stop - puzzle is ready
- If not - go back to step 2
To generate a fully filled out grid I used the same approach when solving Sudoku. That is try putting a number in a cell - and verifying that the puzzle is still valid. Otherwise, backtrack.
Here’s how it looks in code:
function generateSolution(): number[][] {
  const grid = Array.from({ length: 9 }, () => new Array(9).fill(0));
  const state = new SudokuState();

  function fill(row: number, col: number): boolean {
    if (row === 9) {
      return true;
    }

    const nextRow = col === 8 ? row + 1 : row;
    const nextCol = col === 8 ? 0 : col + 1;

    const nums = shuffle([1, 2, 3, 4, 5, 6, 7, 8, 9]);

    for (const num of nums) {
      if (state.canPlace(row, col, num)) {
        state.place(row, col, num);
        grid[row][col] = num;

        if (fill(nextRow, nextCol)) {
          return true;
        }

        state.remove(row, col, num);
        grid[row][col] = 0;
      }
    }

    return false;
  }

  fill(0, 0);

  return grid;
}
This code is almost the same as the code that we wrote last week to solve a Sudoku. Biggest difference is that
here all of the numbers from 1 to 9 tried randomly, and shuffle function helps with that:
function shuffle<T>(nums: T[]): T[] {
  for (let i = nums.length - 1; i > 0; i--) {
    const j = Math.floor(Math.random() * (i + 1));
    [nums[i], nums[j]] = [nums[j], nums[i]];
  }
  return nums;
}
One more piece of the puzzle before we write a puzzle generation - we need to count a number of solutions for a puzzle instead of just solving it. Here’s a modified solving routine from before that also returns a count of solutions:
function countSolutions(board: number[][]): number {
  let count = 0;
  const state = new SudokuState();

  for (let row = 0; row < 9; ++row) {
    for (let col = 0; col < 9; ++col) {
      if (!board[row][col]) continue;
      state.place(row, col, board[row][col]);
    }
  }

  function solve(): boolean {
    for (let row = 0; row < 9; ++row) {
      for (let col = 0; col < 9; ++col) {
        if (board[row][col] === 0) {
          for (let num = 1; num <= 9; ++num) {
            if (state.canPlace(row, col, num)) {
              state.place(row, col, num);
              board[row][col] = num;

              solve();

              state.remove(row, col, num);
              board[row][col] = 0;

              if (count > 1) return true; // early exit
            }
          }

          // No number can be placed — backtrack
          return false;
        }
      }
    }

    count++;
    return false;
  }

  solve();

  return count;
}
One little optimization that I did is that I return early, when encountering a second solution - there is no need to know exactly how many solutions there are - it is enough to know that there is more than one.
With all of the pieces in place, here’s a main routine to generate a puzzle:
function generatePuzzle(grid: number[][], minClues = 32) {
  const puzzle = structuredClone(grid);
  const positions = [];

  for (let row = 0; row < 9; ++row) {
    for (let col = 0; col < 9; ++col) {
      positions.push([row, col]);
    }
  }

  shuffle(positions);

  for (const [row, col] of positions) {
    const temp = puzzle[row][col];
    puzzle[row][col] = 0;

    const clone = structuredClone(puzzle);
    const solutions = countSolutions(clone);

    if (solutions !== 1) {
      puzzle[row][col] = temp;
    }

    const clueCount = puzzle.flat().filter((n) => n !== 0).length;
    if (clueCount <= minClues) break;
  }

  return puzzle;
}
Undo and redo
As you can notice from a screenshot - there are two buttons that allow you to undo your most recent moves and redo them back. It’s a very simple concept - I’m sure you’ve seen it in another pieces of software a lot. And when implementing it, I found that linked list - data structure often criticized for its inefficiency - is perfect for this task! Let’s take a look at how I implemented moves history:
class MoveNode {
  row: number;
  col: number;
  prevNum: number;
  nextNum: number;
  prev: MoveNode | null;
  next: MoveNode | null;

  constructor(row: number, col: number, prevNum: number, nextNum: number) {
    this.row = row;
    this.col = col;
    this.prevNum = prevNum;
    this.nextNum = nextNum;
    this.prev = null;
    this.next = null;
  }

  data() {
    return {
      row: this.row,
      col: this.col,
      prev: this.prevNum,
      next: this.nextNum,
    };
  }
}

class MoveHistory {
  #head: MoveNode;
  #curr: MoveNode;

  constructor() {
    this.#head = new MoveNode(-1, -1, -1, -1);
    this.#curr = this.#head;
  }

  move(row: number, col: number, prevNum: number, nextNum: number) {
    const node = new MoveNode(row, col, prevNum, nextNum);

    this.#curr.next = null;

    this.#curr.next = node;
    node.prev = this.#curr;

    this.#curr = node;
  }

  canUndo(): boolean {
    return this.#curr !== this.#head;
  }

  undo() {
    const data = this.#curr.data();

    if (this.#curr.prev !== null) {
      this.#curr = this.#curr.prev;
    }

    return { row: data.row, col: data.col, num: data.prev };
  }

  canRedo(): boolean {
    return this.#curr.next !== null;
  }

  redo() {
    if (this.#curr.next !== null) {
      this.#curr = this.#curr.next;
    }

    const data = this.#curr.data();
    return { row: data.row, col: data.col, num: data.next };
  }
}
The main piece here is MoveNode - it’s your typical doubly-linked list node with some payload and references to previous and next nodes.
MoveHistory stores a reference to the head of the list and to the current node that we are pointing at the moment. When we undo, we just
move the current pointer back, and if we want to redo - we just move it forward. But when there’s a new move - we insert a new node at the
current position, so this way we can easily discard all of the forward moves. You can use this approach when solving this LeetCode problem:
1472. Design Browser History
Conclusion
Building this Sudoku game has been a rewarding challenge. From puzzle generation to game state management and PWA deployment, every step was an opportunity to learn. I hope this inspires you to build something playful with algorithms too! 🎮
Source code for the game is available in this repository: https://github.com/chornonoh-vova/sudoku .
And you can play the game by yourself here: https://chornonoh-vova.github.io/sudoku/